
How to Make a Dried Fall Garland
Store-bought fall garlands often look full in the package and flat on the mantel. A dried fall garland DIY changes that, because you pick the colors and the textures. Dried orange slices glow like small lanterns next to the pinecones. Crinkled leaves add a real-autumn feel that plastic copies just cannot match.
This project takes about 45 minutes of hands-on time. If you dry your own orange slices, add a few hours for the oven. Most of the materials cost little or nothing. A walk in the yard can give you pinecones, seed pods, and pretty leaves. Once you learn the layering trick in this tutorial, you can make the garland any length. Try a short shelf accent or a full mantel swag.
Time: 45 minutes | Difficulty: Easy
What You’ll Need
- Jute twine or cotton rope, 7 feet long
- Dried orange slices, 12 to 16 pieces
- Small pinecones, 6 to 8
- Dried fall leaves, about 30
- Dried hydrangea blooms or wheat stems, 5 to 6 stems
- Cinnamon sticks, 6 (each about 3 inches long)
- Floral wire, 24-gauge, 3 feet; or a hot glue gun with 4 glue sticks
- Craft scissors, 1 pair
- Sheet pan lined with parchment paper (only if drying your own orange slices)
Step 1: Dry the Orange Slices

Slice two large oranges into rounds about 1/4 inch thick. Thicker slices hold their shape well, while thinner ones can curl and turn dark. Lay the rounds on a parchment-lined sheet pan in a single layer, then bake at 200 degrees for 2 to 3 hours, flipping them halfway through. Use oven mitts when you handle the pan. It stays hot long after you pull it out. The slices are done when they feel dry and stiff, with no sticky spots. Let them cool on the pan for 20 minutes. This is the only slow step, and you can do it a day ahead. Store-bought dried orange slices work too, and they skip this step entirely.
Step 2: Cut the Base and Plan the Layout
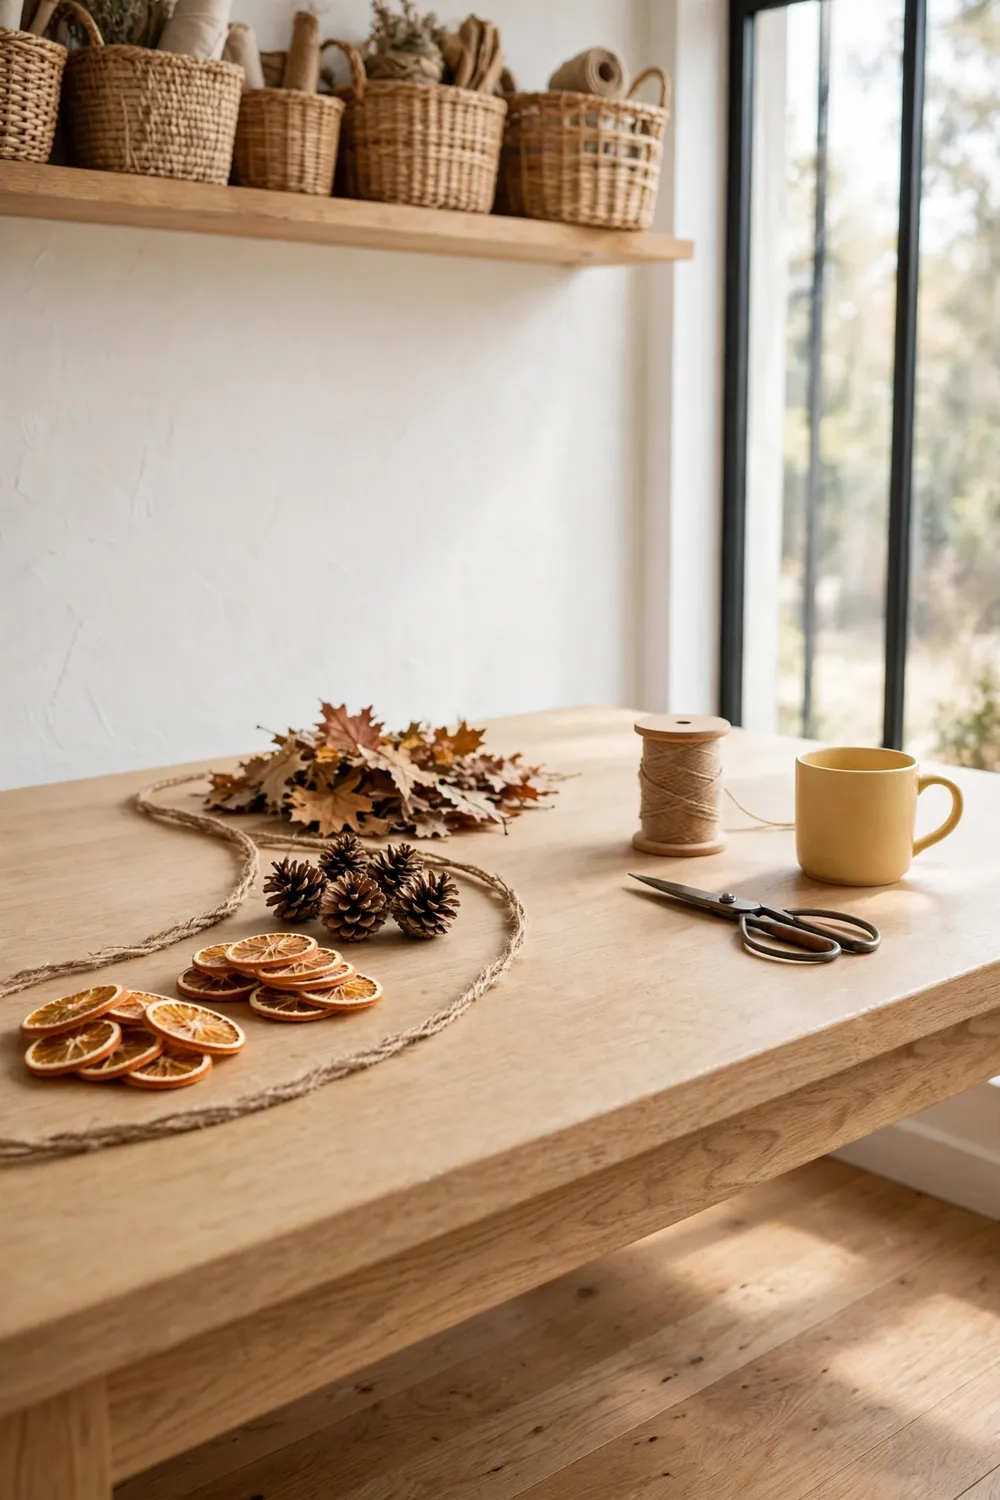
Cut 7 feet of jute twine for a standard mantel garland, and tie a small loop at each end. This gives you a place to hang it later. Lay the twine in a gentle curve across your table. Use the same shape it will take on the mantel. Sort your dried pieces into small piles now. Put orange slices together, pinecones together, and leaves together. Slide the piles along the twine to plan where each one will go. Place the largest pieces first in your mind, and space them evenly. This quick dry run keeps the finished garland balanced. One end will not look heavier than the other.
Step 3: Attach the Large Anchor Pieces

Start with the pinecones, since they are the heaviest pieces and they set the rhythm of the garland. Cut six short lengths of floral wire, about 6 inches each. Wrap one piece of wire around the base of a pinecone, then twist it firmly around the twine. Space the pinecones about 12 inches apart, starting 6 inches from each end. Give each wire a gentle tug to make sure it holds. If you prefer glue, put a dab of hot glue on the twine. Press the pinecone in place for 10 seconds. Hot glue works best on a cool, dry day, since damp air slows the bond.
Step 4: Add the Middle Layer of Orange Slices
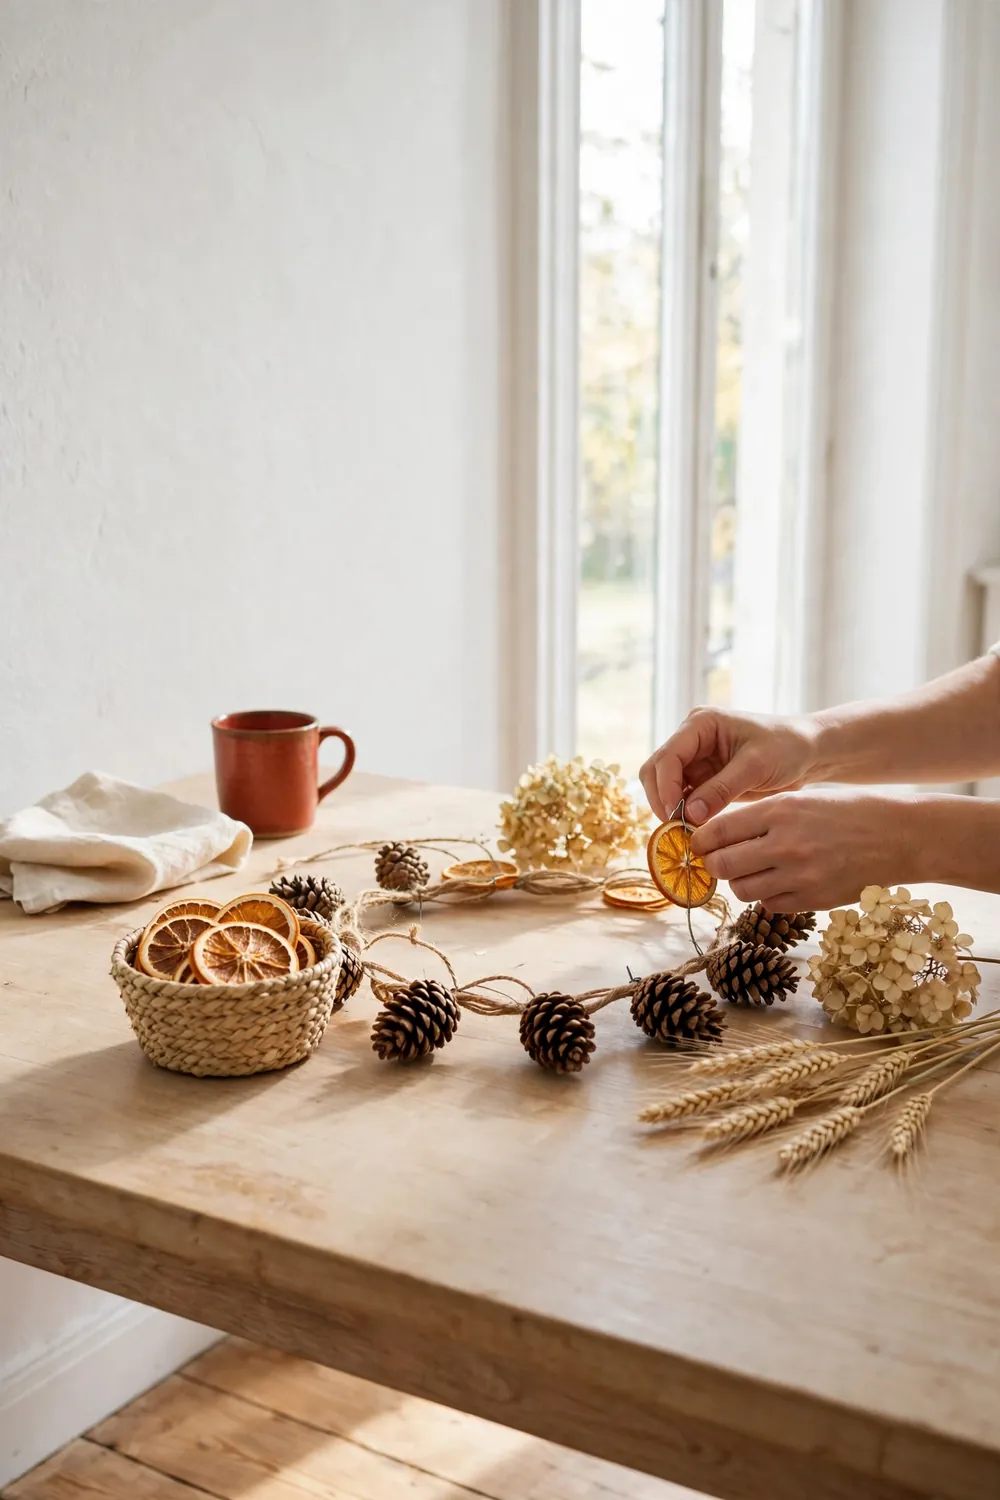
Orange slices are the stars of this garland, so give them the spotlight spots between the pinecones. Thread a 6-inch piece of floral wire through the top edge of a dried slice. You can also add a dab of hot glue to its back. Attach each slice just above the twine so it hangs like a little pendant. Alternate the slices with small groups of hydrangea blooms or wheat stems for a soft, full look. Stand back after every three or four pieces and check the shape from a few feet away. The garland should look full from the front and neat from the sides.
Step 5: Tuck In the Leaves and Small Fillers

This is the layer that gives the garland its gathered-from-nature look. Tuck dried leaves into the gaps between the larger pieces, sliding each stem behind the twine and letting the leaf face forward. Add cinnamon sticks in pairs, tied with a short piece of twine for a tidy bundle. Drop in dried seed pods or small acorns anywhere the garland still shows bare twine. Turn the whole garland over once to check the back, since mantels are often seen from below. Fill any thin spots until the garland looks even along its full length.
Step 6: Finish the Ends and Check the Balance

Hold the garland up at arm’s length and look at the two ends. They should mirror each other in fullness, with no long bare stretch of twine. Snip any stems that stick out past the end loops, keeping about 2 inches of twine for hanging. Give the whole garland a light shake over the table. This catches any loose pieces before they fall on your floor. If anything drops, reattach it now while your supplies are still out. Hang a loop on each end over a hook and step back. Your dried fall garland is ready to enjoy all season.

Frequently Asked Questions
How long will a dried fall garland last?
A dried garland kept indoors usually looks good for one full fall season, about 8 to 12 weeks. Keep it away from sunny windows and heating vents, since strong light fades the colors and dry heat makes leaves brittle. A light mist of unscented hairspray at the start helps the leaves hold their shape, and you can compost the natural pieces when the colors dull.
Can you mix fresh greenery into a dried garland?
Fresh greenery works as a short-term accent, but it will wilt while the dried pieces stay the same. For a party, tuck in eucalyptus or cedar sprigs the day of the event and pull them out after. For a garland that stays up all season, stick with fully dried materials such as lavender and wheat stems.
How do you store a dried fall garland for next year?
Lay the garland flat in a wide box with tissue paper between the layers. A plastic bin with a lid keeps out dust and pests during the off-season. Store the box in a cool, dry closet, never in a damp basement or a hot attic. Most dried garlands keep their shape for two or three seasons if you unpack them with care.
Where should you hang a dried fall garland?
Mantels, stair railings, and door frames are the classic spots, and all of them show off the length of the garland. Use removable hooks rated for at least 2 pounds so the garland stays put without harming the paint. Keep it away from candles and fireplaces that get used, since dried materials can catch fire. A garland on a covered porch lasts as long as one indoors if rain cannot reach it.
Dried Fall Garland Made Simple
Once you have made one dried garland, the next ones come together fast. Swap in dried apple slices or make a shorter version for a doorway. The same layering method works for winter and spring garlands too, so this little skill keeps paying off all year. Save this tutorial to your fall decor board so it is ready when the leaves start to turn.