25 DIY Christmas Ornaments Anyone Can Make
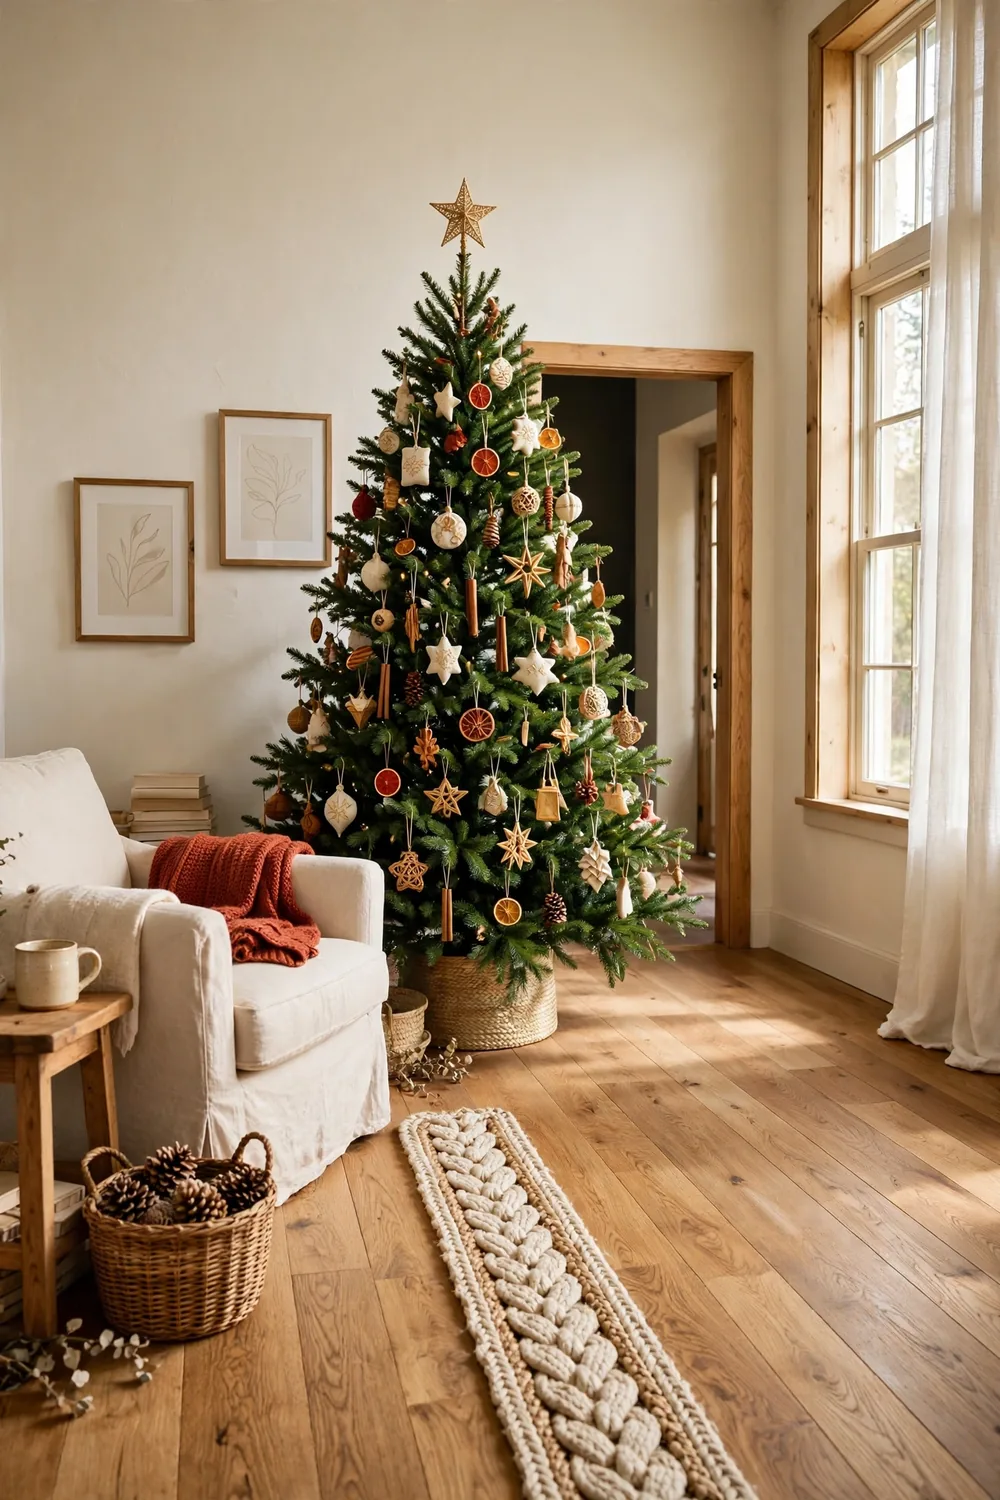
There is something special about a tree dressed with ornaments made by hand. Store-bought baubles look fine, but DIY Christmas ornaments give the tree a warm feel that no boxed set can match. Most projects here use supplies from kitchen drawers or craft boxes.
Below you will find 25 simple ideas, from cinnamon bundles that scent the room to painted wood discs kids can help make. Each project takes an afternoon or less, and most cost little or nothing. Pick one to start tonight, or work through the whole list before Christmas morning. Clear the table, put on some music, and make an evening of it.
1. Cinnamon Stick Bundles
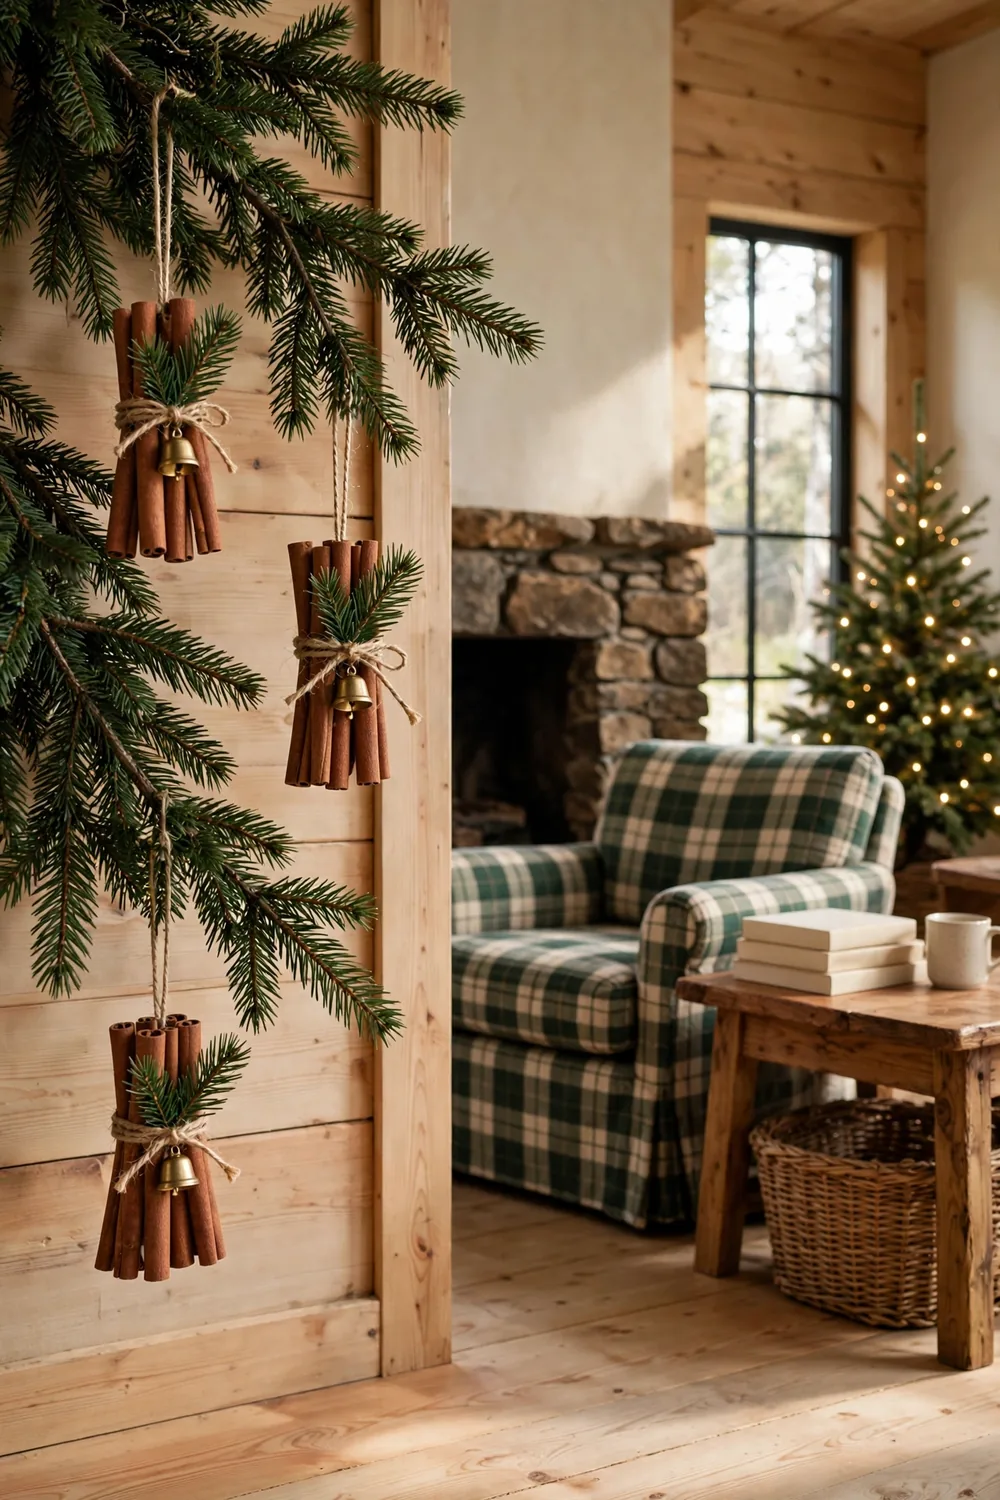
Bundle five or six cinnamon sticks with natural twine for an ornament that smells like the season. Tuck a small sprig of pine into the knot and add a tiny brass bell beside it. The bell rings softly each time the tree sways.
Store finished bundles flat between sheets of tissue so they keep their shape. Make a dozen in one sitting and use the extras as gift toppers. When the scent fades, one drop of cinnamon oil on the back brings it back.
2. Dried Orange Slice Ornaments
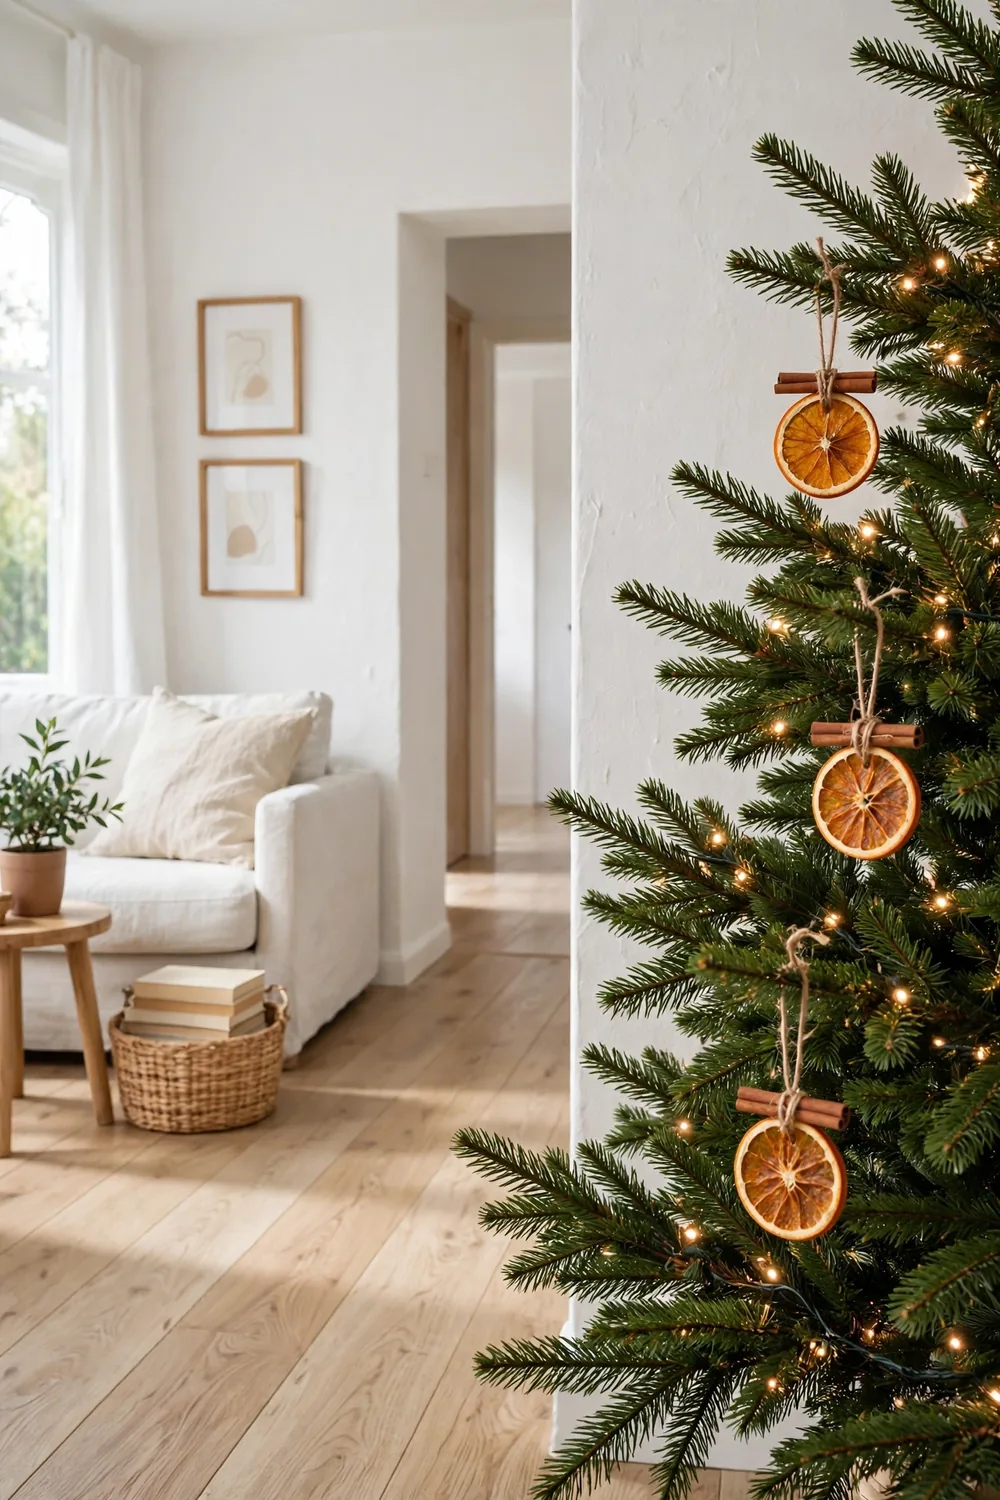
Cut oranges into rounds a quarter inch thick and dry them low in the oven until crisp. This takes a few hours, so start early and check the slices now and then. Thread twine through the tops once they feel dry and firm.
Hang the slices where tree lights shine through them so they glow like small lanterns. Tie a cinnamon stick or bay leaf to each one with the same twine. Keep the flat slices and toss any that curl too much.
3. Frost-Tipped Pinecone Ornaments

Brush white craft paint lightly over the tips of pinecone scales to mimic fresh frost. Use a dry brush and drag the bristles across the surface. Dipping too deep fills the cracks with paint. Less paint gives a more natural look.
Screw a small eye hook into the base of each cone and hang it with gold or plain twine. Group three mixed-size cones on one branch for a fuller look. A pinch of fine glitter on wet paint adds sparkle in evening light.
4. Salt Dough Handprint Ornaments
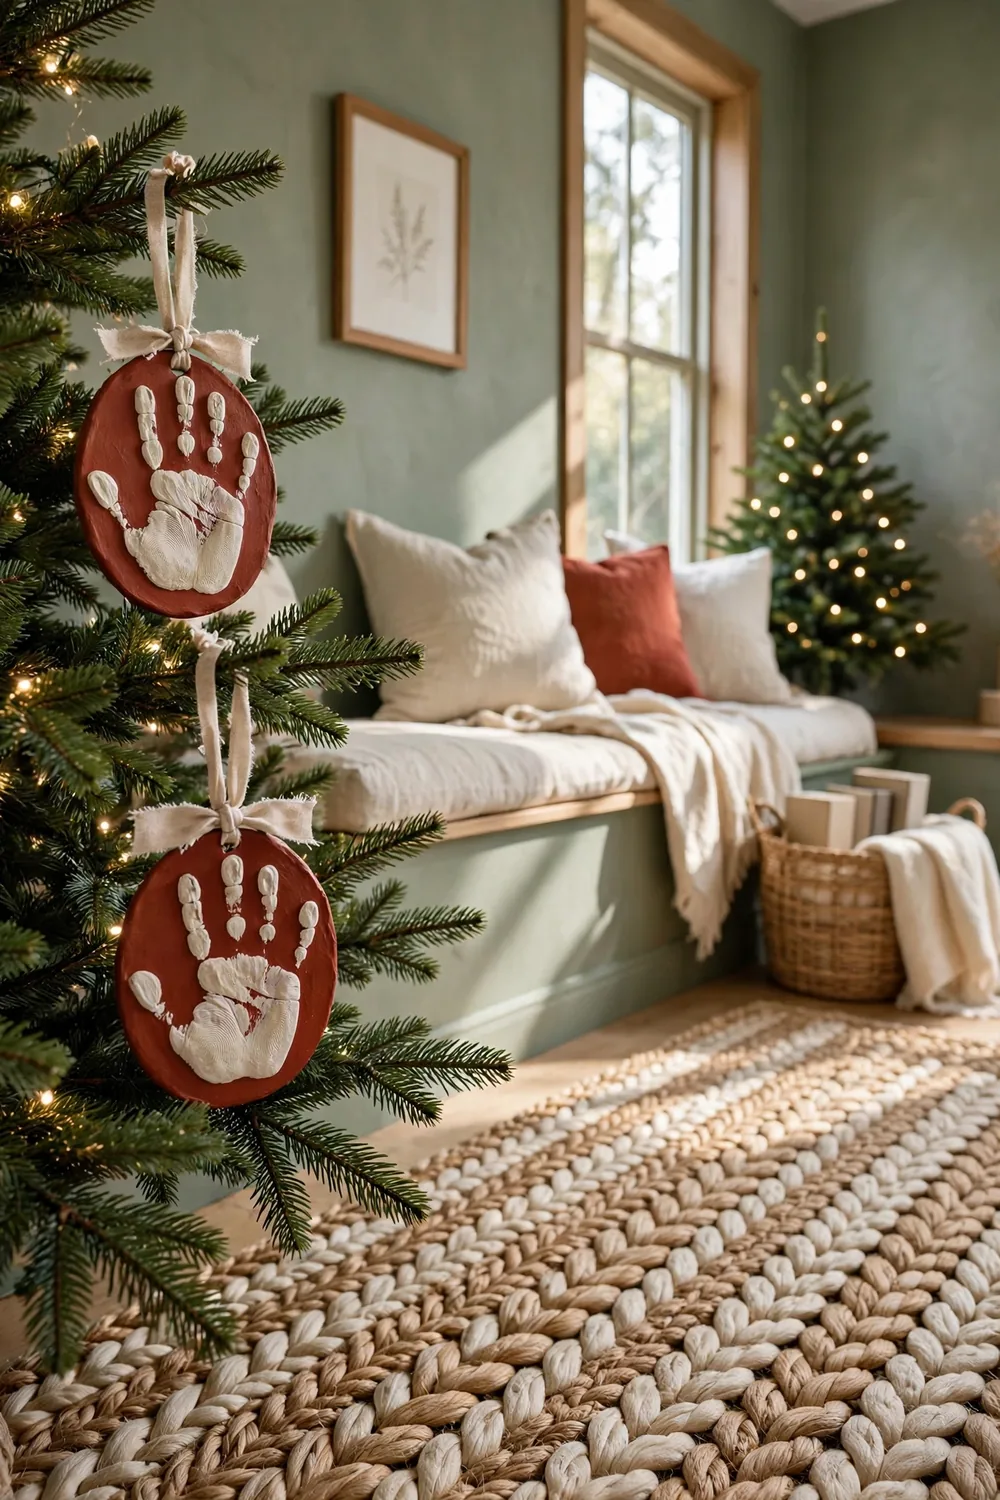
Mix two cups of flour, one cup of salt, and a cup of water into a firm dough. Roll it half an inch thick and press a small hand into the surface. Cut a wide margin around the print. Poke a hole near the top with a straw.
Bake at 200 degrees for three hours, flipping once, until hard all the way through. Paint the hand white and the background red or green, then seal with acrylic. Write the name and year on the back.
5. Felt Ball Ornaments
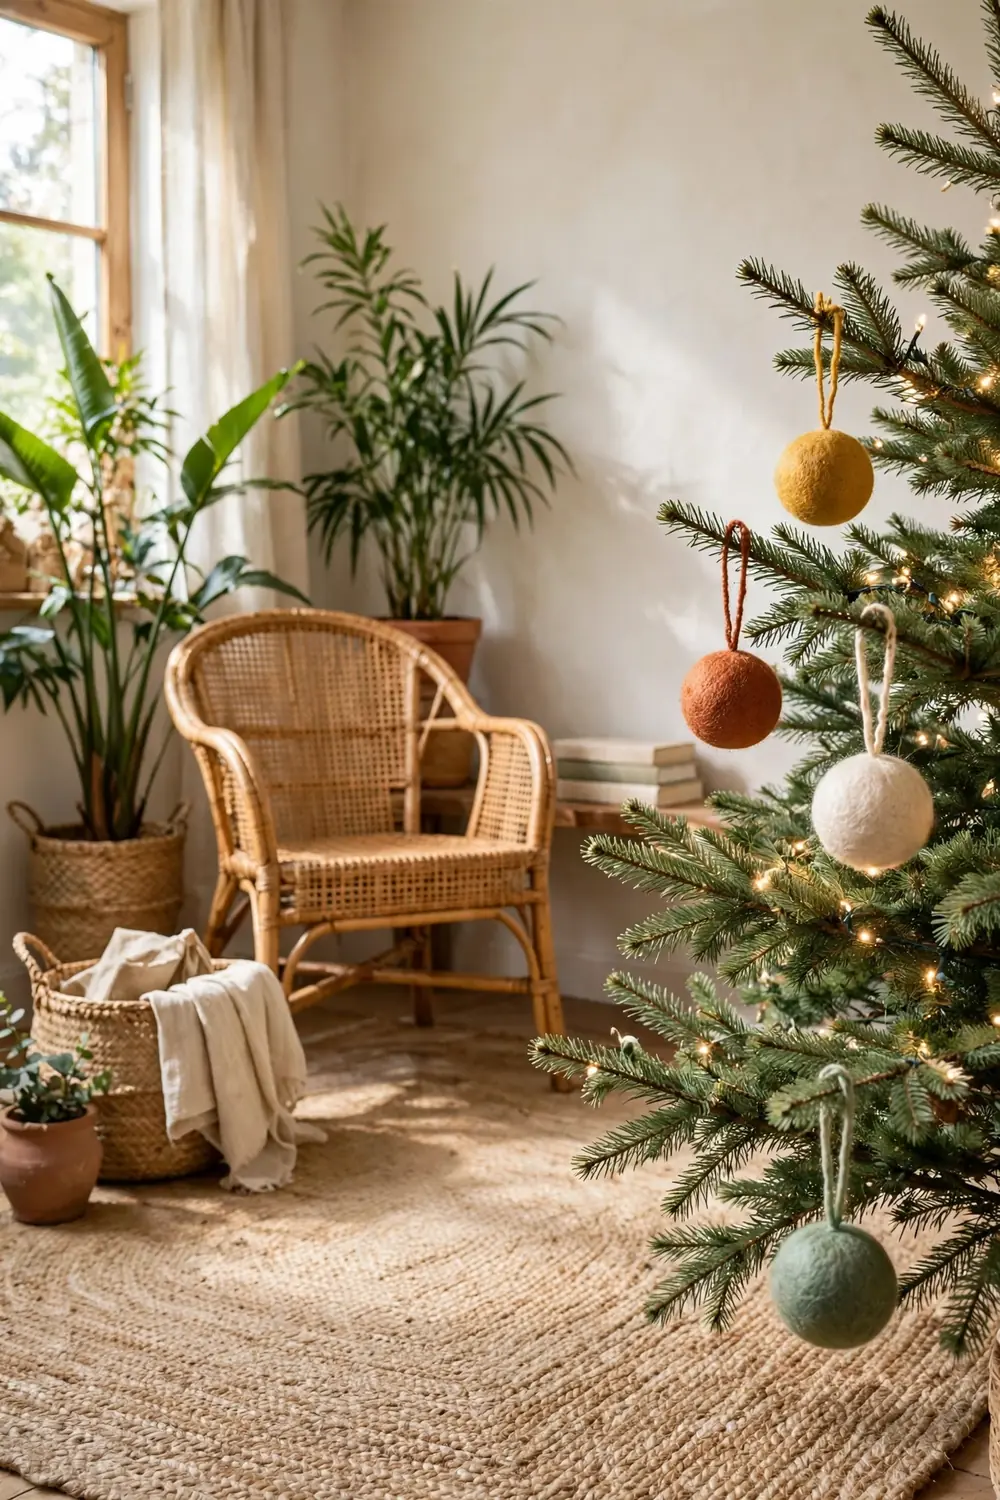
Roll wool roving into tight balls with warm soapy water until each one holds firm at about two inches wide. Squeeze and shape as you roll, then rinse in cold water and let the balls dry overnight on a rack.
Thread embroidery floss through the center of each ball with a long needle to make a hanging loop. Mix plain colors with a few striped balls for variety. These soft balls are safe on low branches where little hands like to touch.
6. Folded Paper Star Ornaments
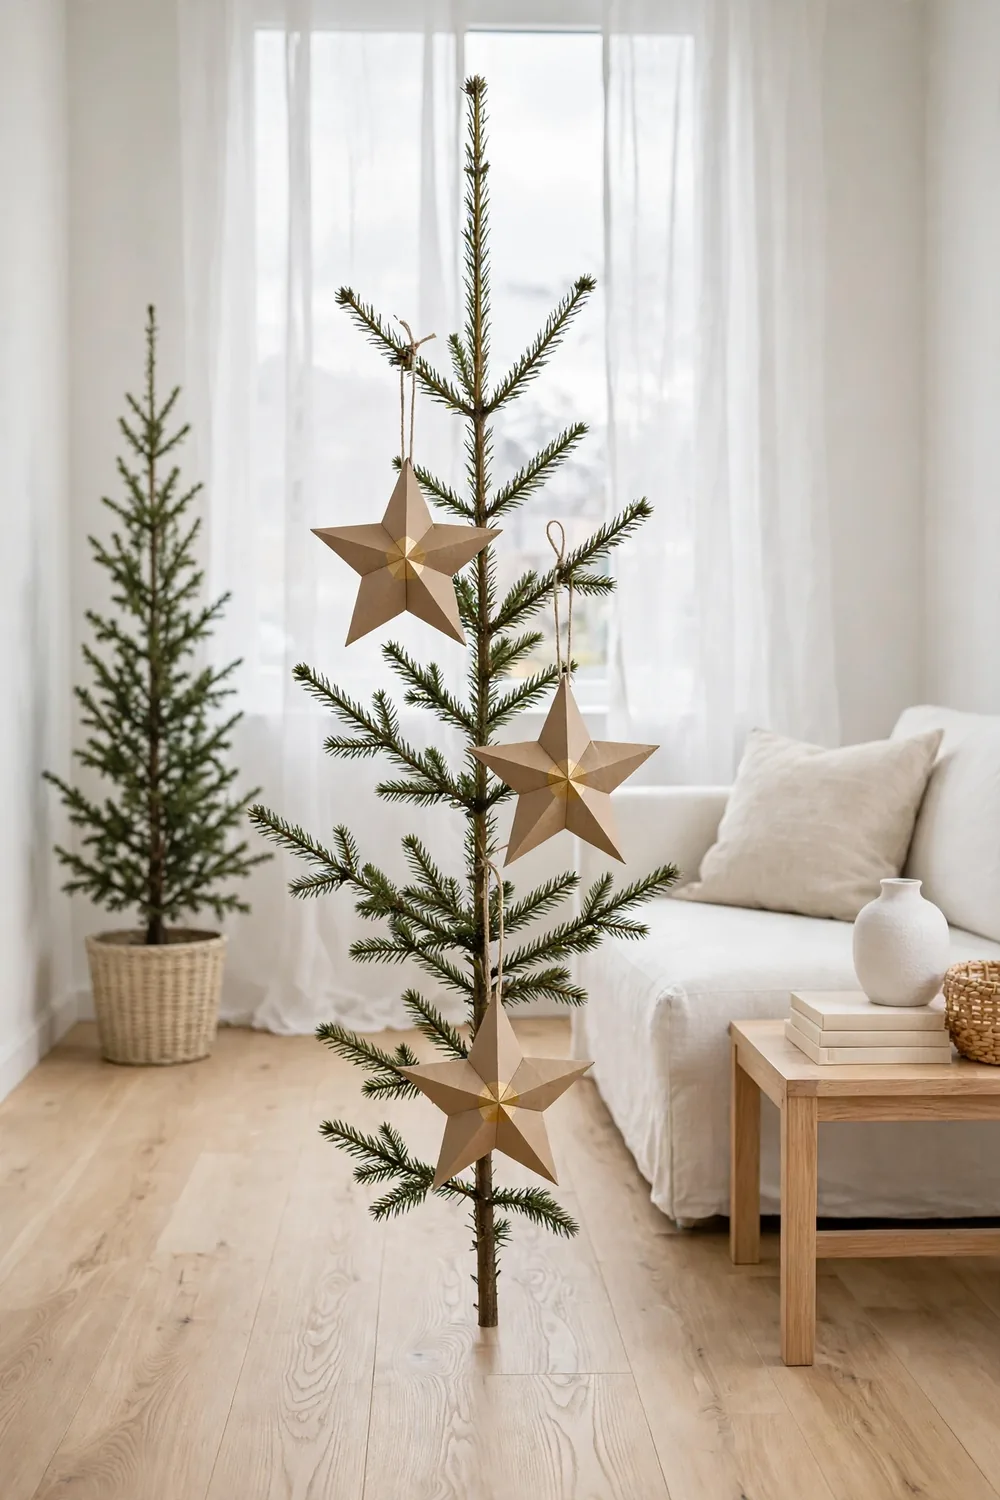
Cut kraft paper or old book pages into long strips and fold them into five-pointed stars. Crease each fold hard with a ruler edge so the points hold their shape. Sharp creases make the whole star crisper.
Glue the ends together and press the star under a heavy book for one hour. Add a linen thread loop and a dab of gold paint at the center. Fold stars in three sizes and hang the largest ones near the top of the tree.
7. Scrap Fabric Ball Ornaments

Wrap plain foam balls with leftover fabric, cutting squares big enough to overlap slightly. Pin the fabric in place, glue the seam flat, and smooth wrinkles with your fingers while the glue stays tacky. Work slowly for a neat finish.
Top each ball with a ribbon loop and a small bow from a matching scrap. Crisp cotton gives a tidy look, while flannel reads soft and rustic. This project uses up the smallest scraps, so almost nothing goes to waste.
8. Twig Star Ornaments
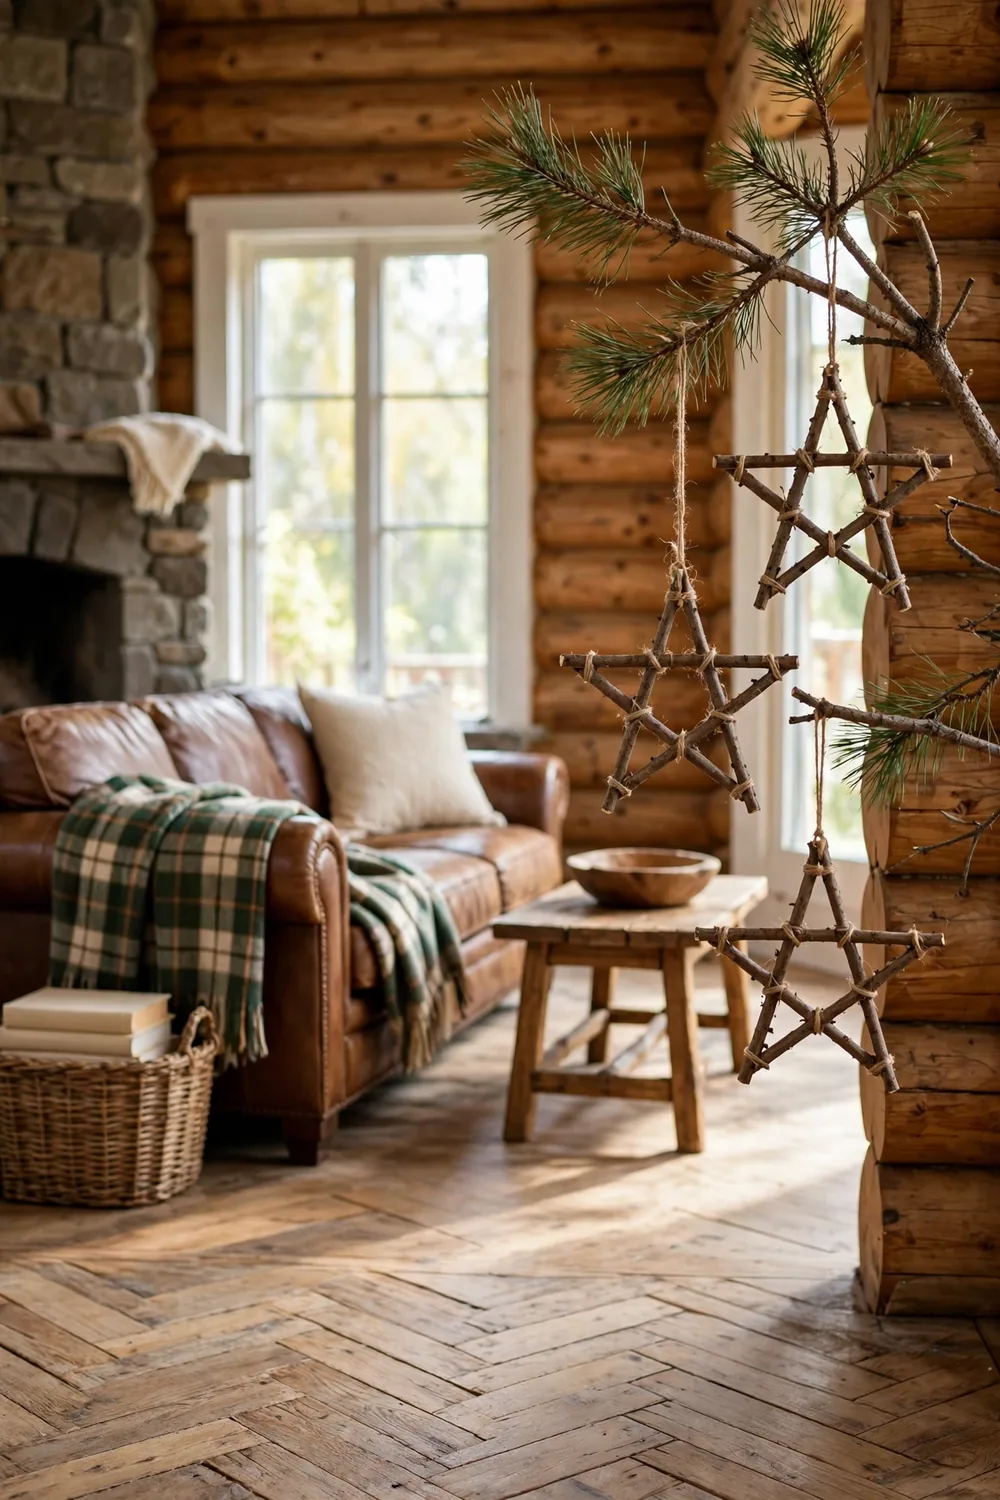
Cut five straight twigs to equal length, about eight inches each, choosing pieces as thick as a pencil. Lay them into a five-pointed star with the ends crossed, then lash each joint tight with twine or thin wire. Trim the twine ends close.
Hang the star from a loop tied at the top point. For extra glow, wrap the twigs with tiny fairy lights first and tuck the battery pack behind one joint. Groups of three stars look best hung together on bare branches.
9. Mason Jar Lid Wreath Ornaments
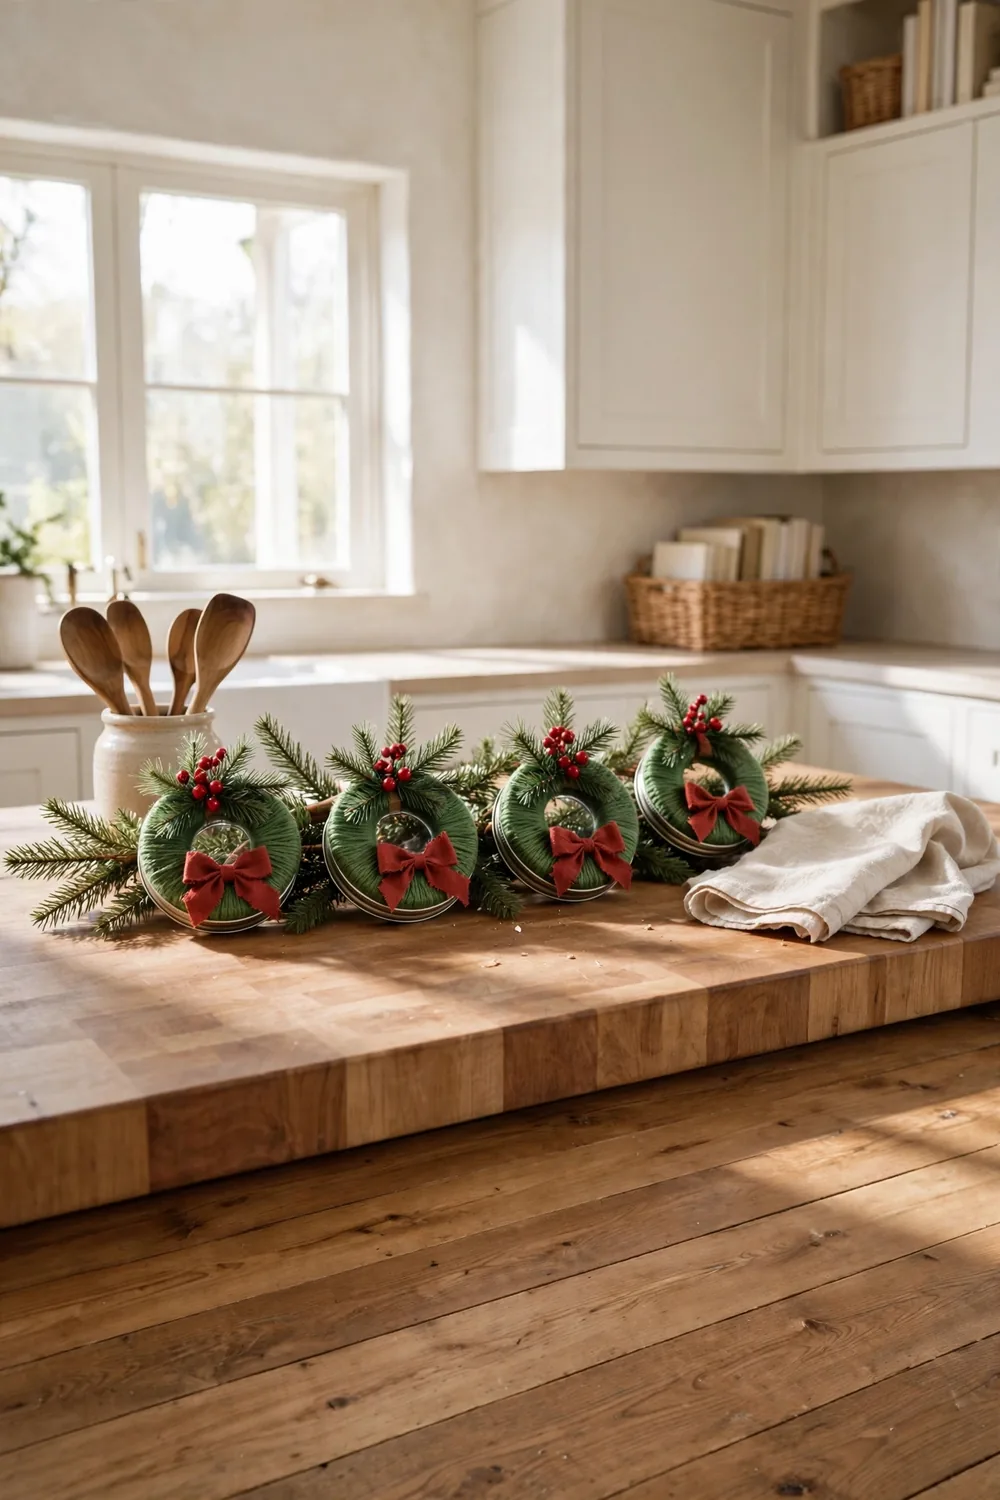
Remove the flat insert from a mason jar lid and wrap the metal ring with green yarn until no metal shows. Glue on small sprigs of faux pine, a few red berries, and a tiny bow. This forms a wreath about three inches wide.
Tie a twine loop at the top for hanging. Silver lids give a modern feel, while gold lids read more classic. Hang a row of these small wreaths along a garland or cluster them on one side of the tree.
10. Painted Wood Slice Ornaments

Sand small wood slices smooth on the flat faces, keeping the bark edge for charm. Paint simple designs on each face: a snowflake, a tiny tree, or the family name in neat letters. Keep the art bold so it reads from across the room.
Poke the hanging hole near the top before painting so it never cracks the design. Finish with two thin coats of clear sealer for safe storage year after year. Let each coat dry for about one hour in a warm room.
11. Framed Photo Ornaments

Print favorite snapshots small enough to fit tiny frames or clear baubles that open in half. Trim each photo to size and slip it into the frame. Add a thin ribbon loop so it hangs straight on the branch.
Hang one photo per family member on the same branch to build a small gallery. Laminate the prints first so they never curl in the warmth of the tree lights. Grandparents love these as gifts, since they always want more photos.
12. Beaded Icicle Ornaments

Thread clear and silver beads onto long headpins. Start with large beads at the top and end with tiny ones at the point. Twist the wire into a small loop at the top so each icicle hangs straight and catches light along its length.
Mix faceted crystal beads with plain glass rounds for extra sparkle. Make each icicle six to eight inches long so it shows clearly against green branches. Hang them near the front of the tree where lights hit them directly.
13. Wine Cork Reindeer Ornaments
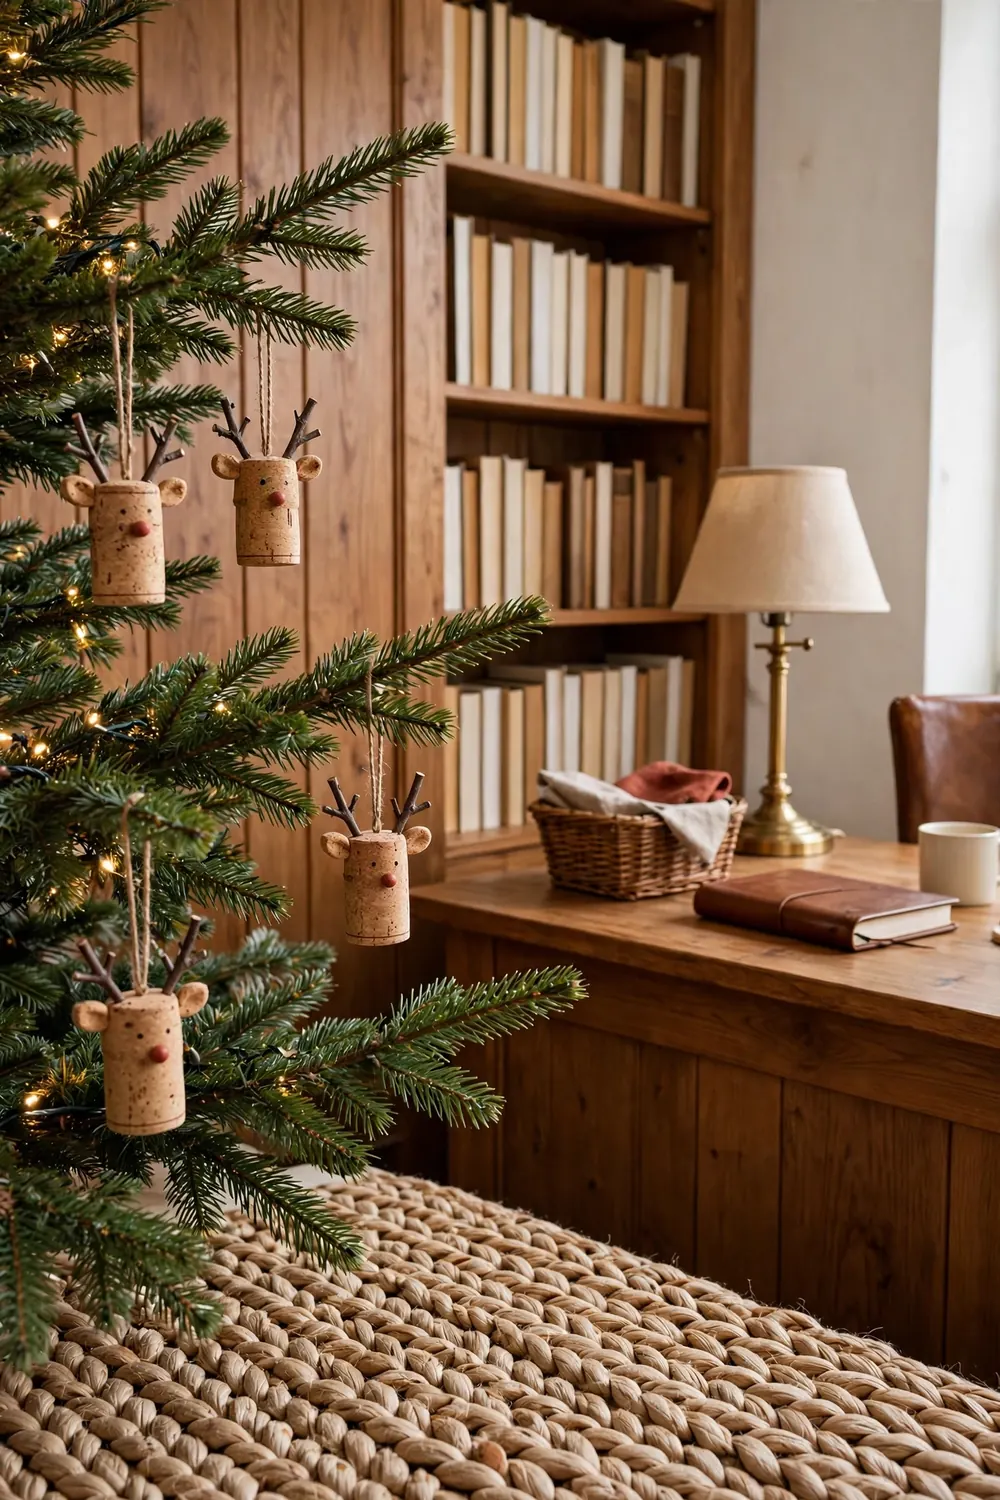
Glue two wine corks at an angle to form the head and body of a tiny reindeer. Add twig antlers and a red bead nose with hot glue, then paint two small black dots for eyes. Keep the face simple and sweet.
Tie a twine loop around the neck for hanging. Line up several reindeer on one branch so they look like a small herd mid-prance. This project puts the cork collection in the kitchen drawer to good use.
14. Button Wreath Ornaments
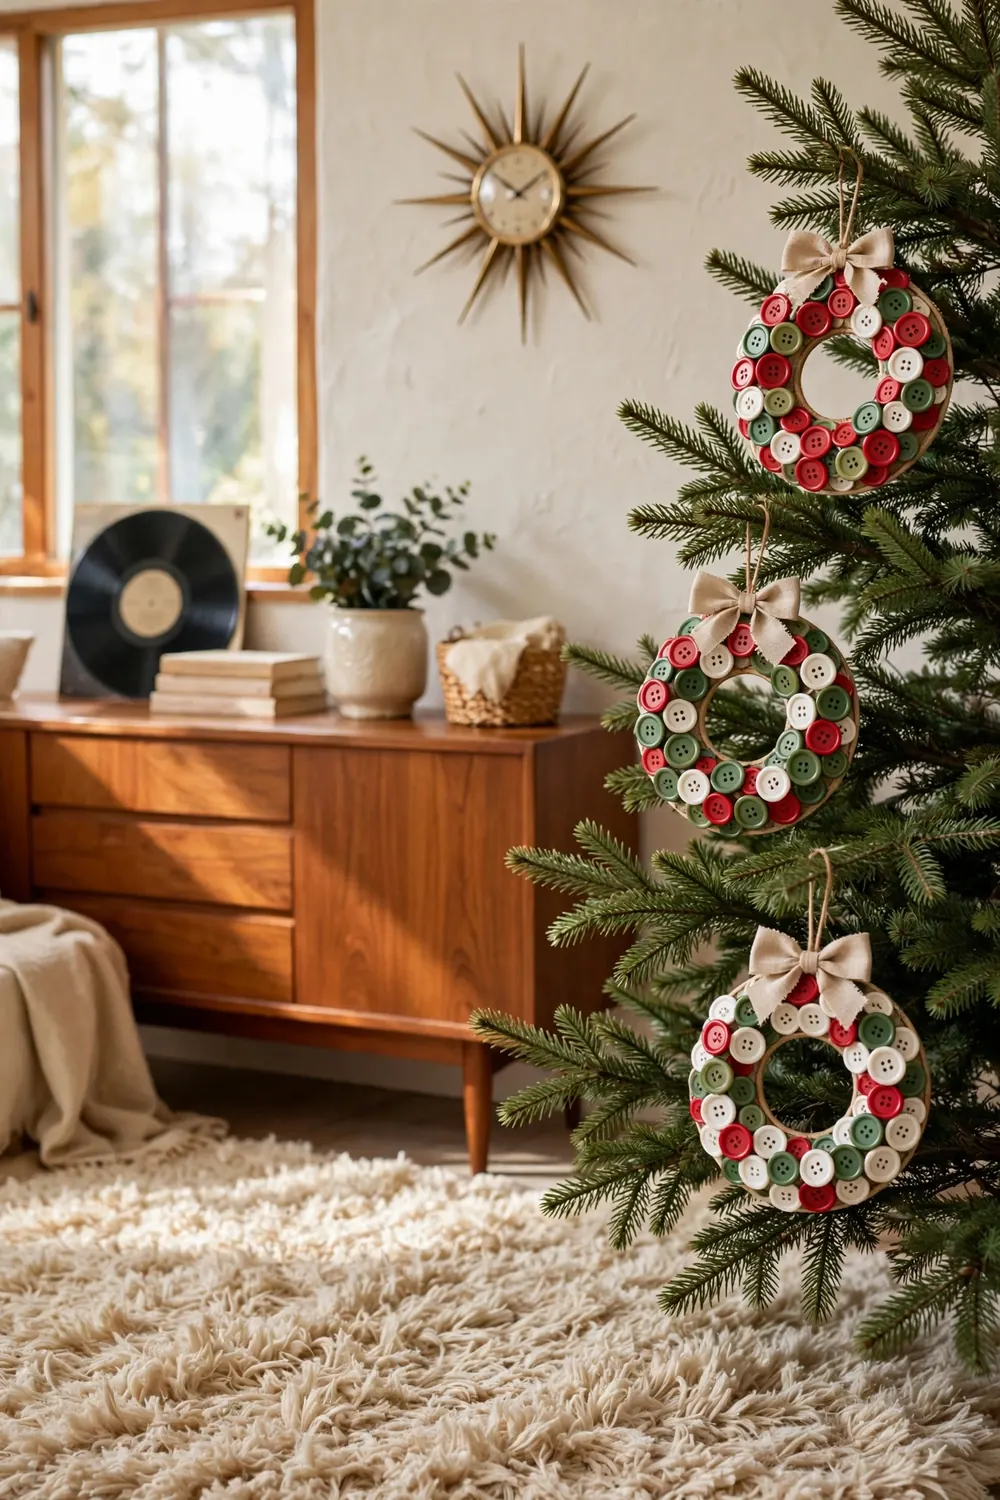
Sort old buttons by color and glue them in rings onto a small cardboard circle with the center cut out. Overlap the buttons and fill every gap so no cardboard shows. Mixed sizes give a nice texture that catches the light.
Add a small bow at the top and a ribbon loop for hanging. Red and green buttons feel classic, while all-white buttons look frosty. Check craft store bins for mixed button bags, which keep this project cheap and fun.
15. Yarn-Wrapped Ball Ornaments

Brush a foam ball with a thin coat of craft glue. Wrap it tight with yarn, turning the ball so no foam peeks through. Tuck the starting end under the first wraps and glue the last end flat. Keep the tension even as you go.
Chunky yarn gives a cozy texture, while thin metallic thread looks dressier. Glue two small felt leaves at the top to turn the ball into a tiny apple. Each ball takes about fifteen minutes once you find a rhythm.
16. Acorn Cap Ornaments
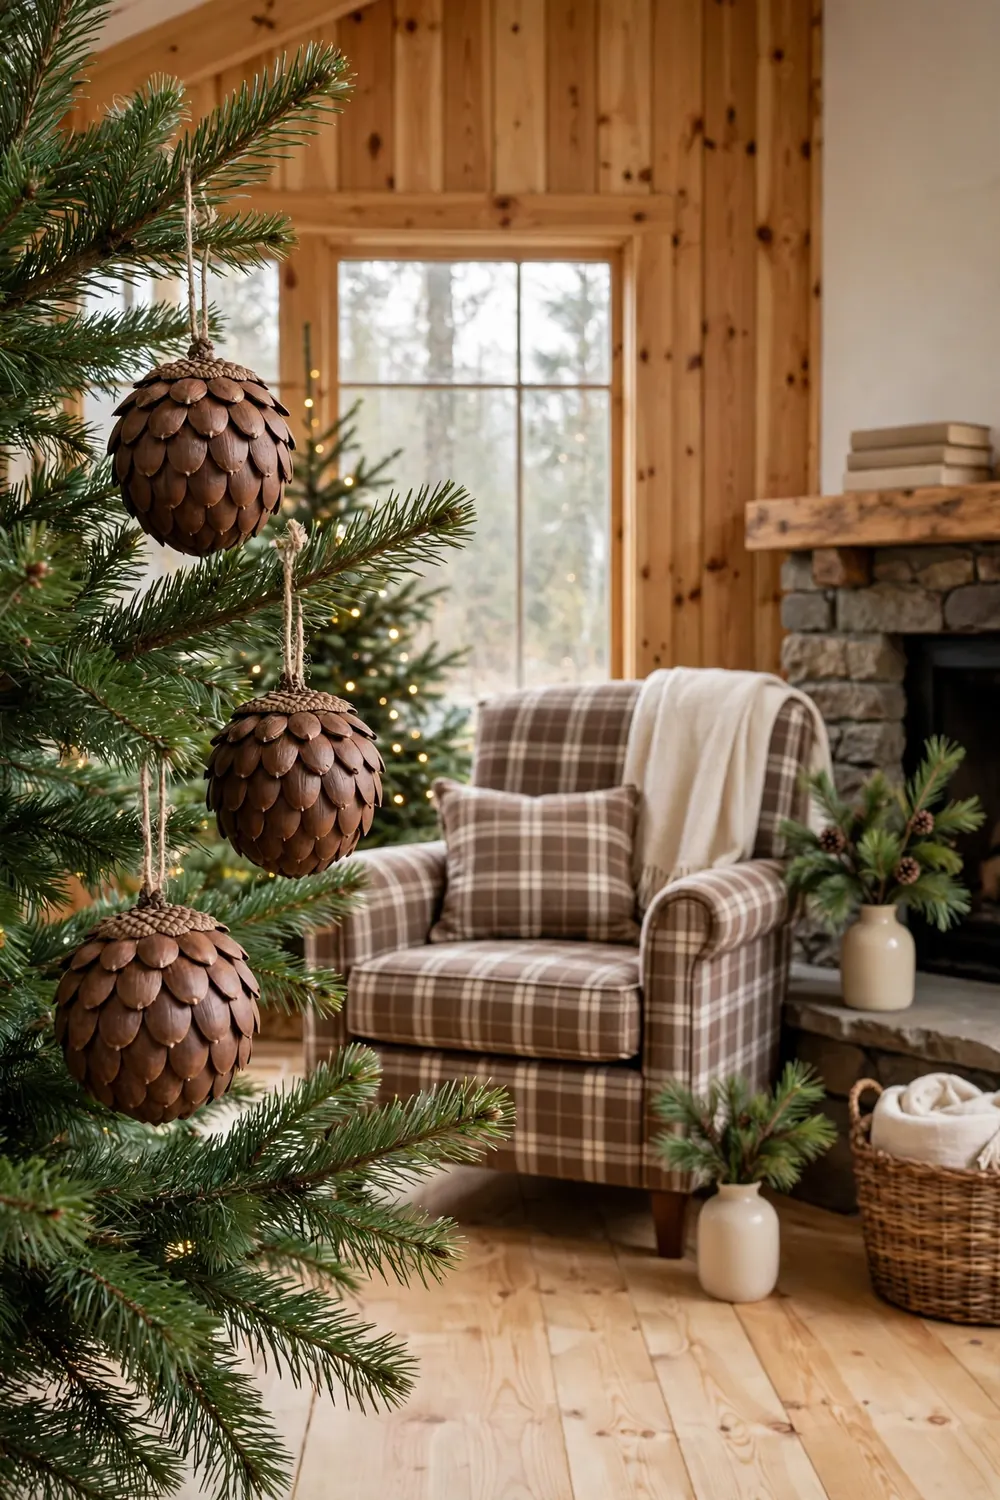
Glue acorn caps in tight rows around a foam ball. Start at the bottom so each row overlaps the one below like shingles. Press each cap firm and hold it a few seconds until the glue grabs. Full coverage looks best.
Tie a twine loop through a pin pushed into the top of the ball. A light brush of gold paint adds warm glow, though the plain brown caps look rich alone. Gather caps in early fall when they cover the ground.
17. Painted Walnut Shell Ornaments
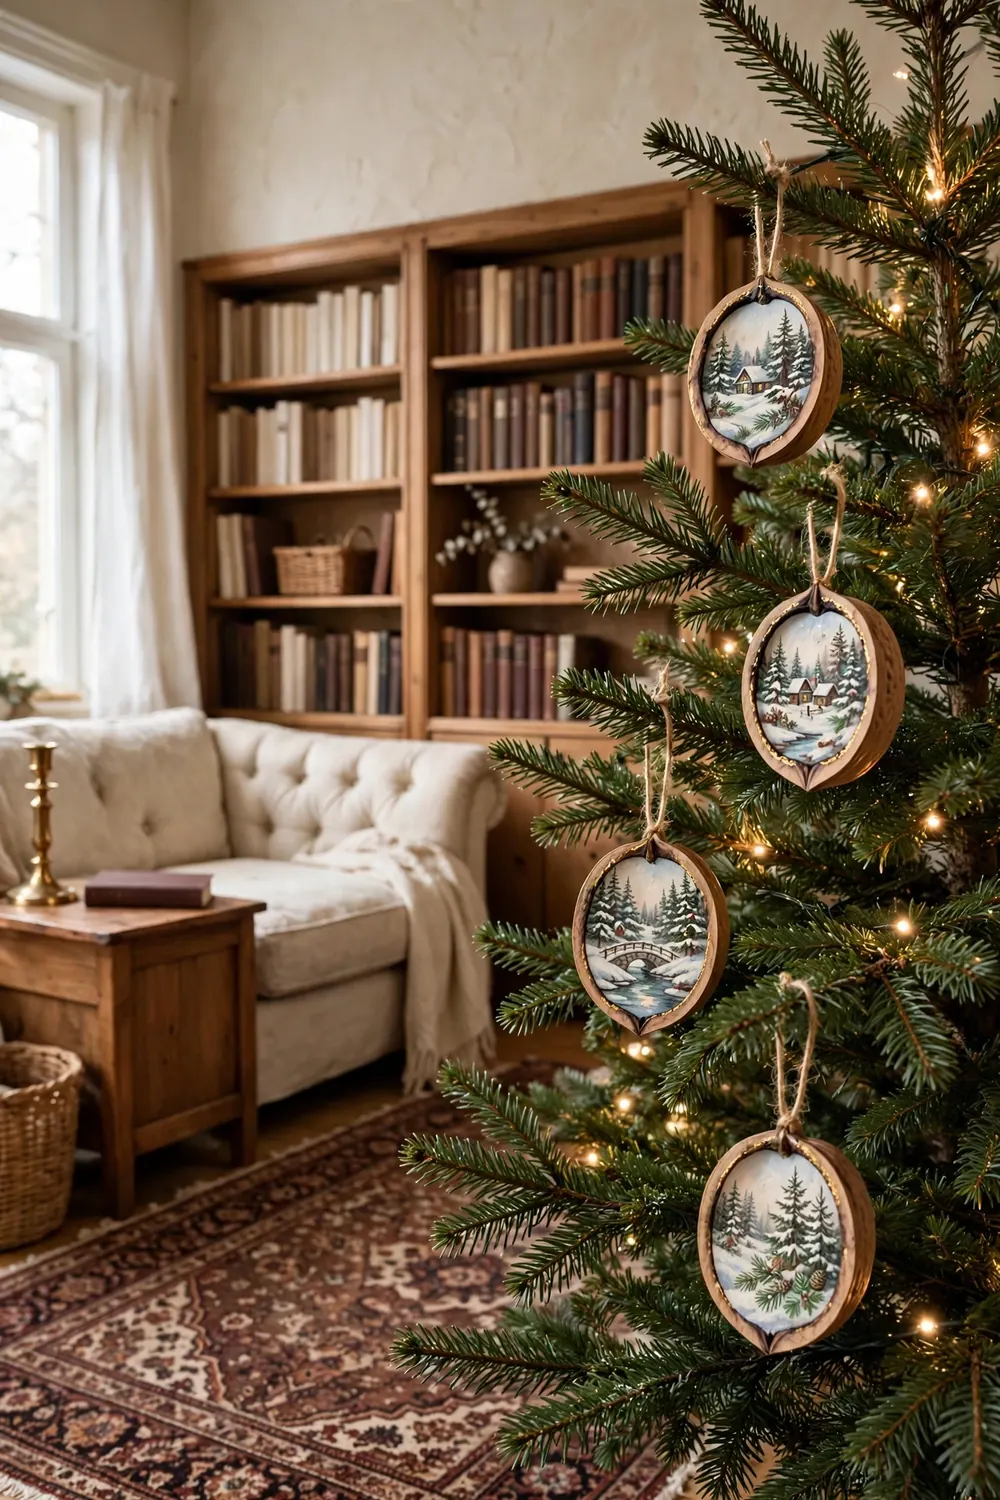
Crack walnuts gently so the halves stay whole, clean out the insides, and paint tiny winter scenes or simple dots and stripes. The curved shell forms a natural small canvas, and its ridges add texture under the paint.
Glue a thread loop inside one half before painting so the hanger stays hidden. Line the rim with a thin stroke of gold paint for a finished edge. Hang these on sturdy upper branches, away from wagging tails.
18. Quilled Paper Snowflakes
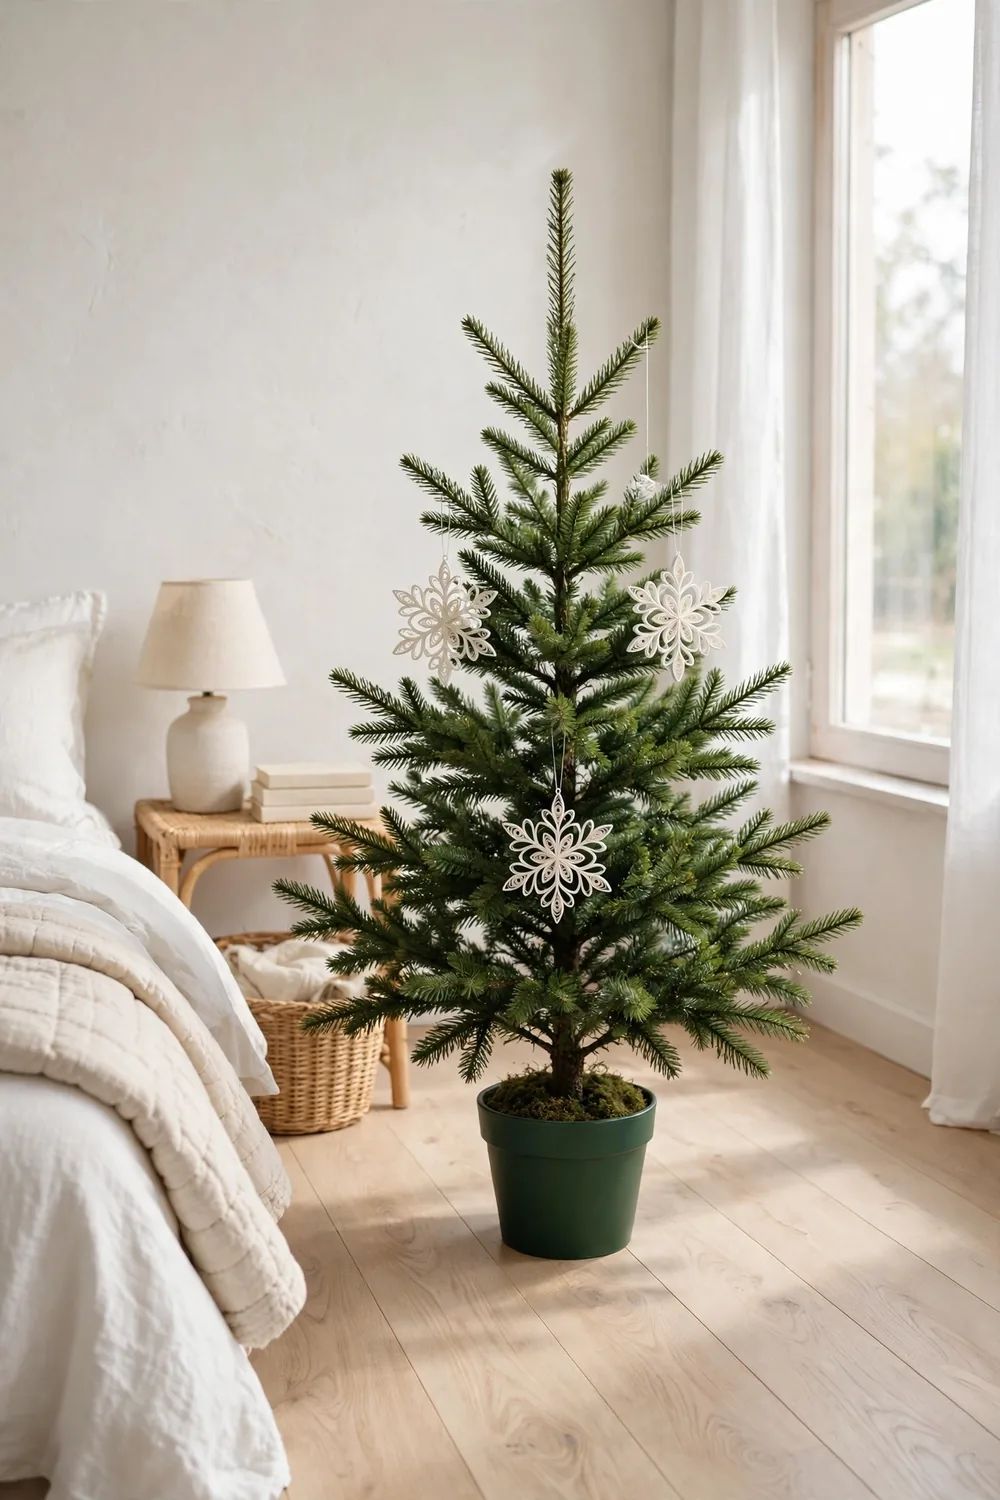
Cut white paper into thin strips and roll them into coils and scroll shapes with a toothpick. Pin the shapes on a foam board in a snowflake pattern. Glue each piece to its neighbors, building outward from the center.
Keep both sides even so the flake looks balanced from any angle. Mist the finished snowflake with craft stiffener so it holds shape on the tree. Hang with clear thread so each flake seems to float.
19. Burlap Ribbon Ornaments
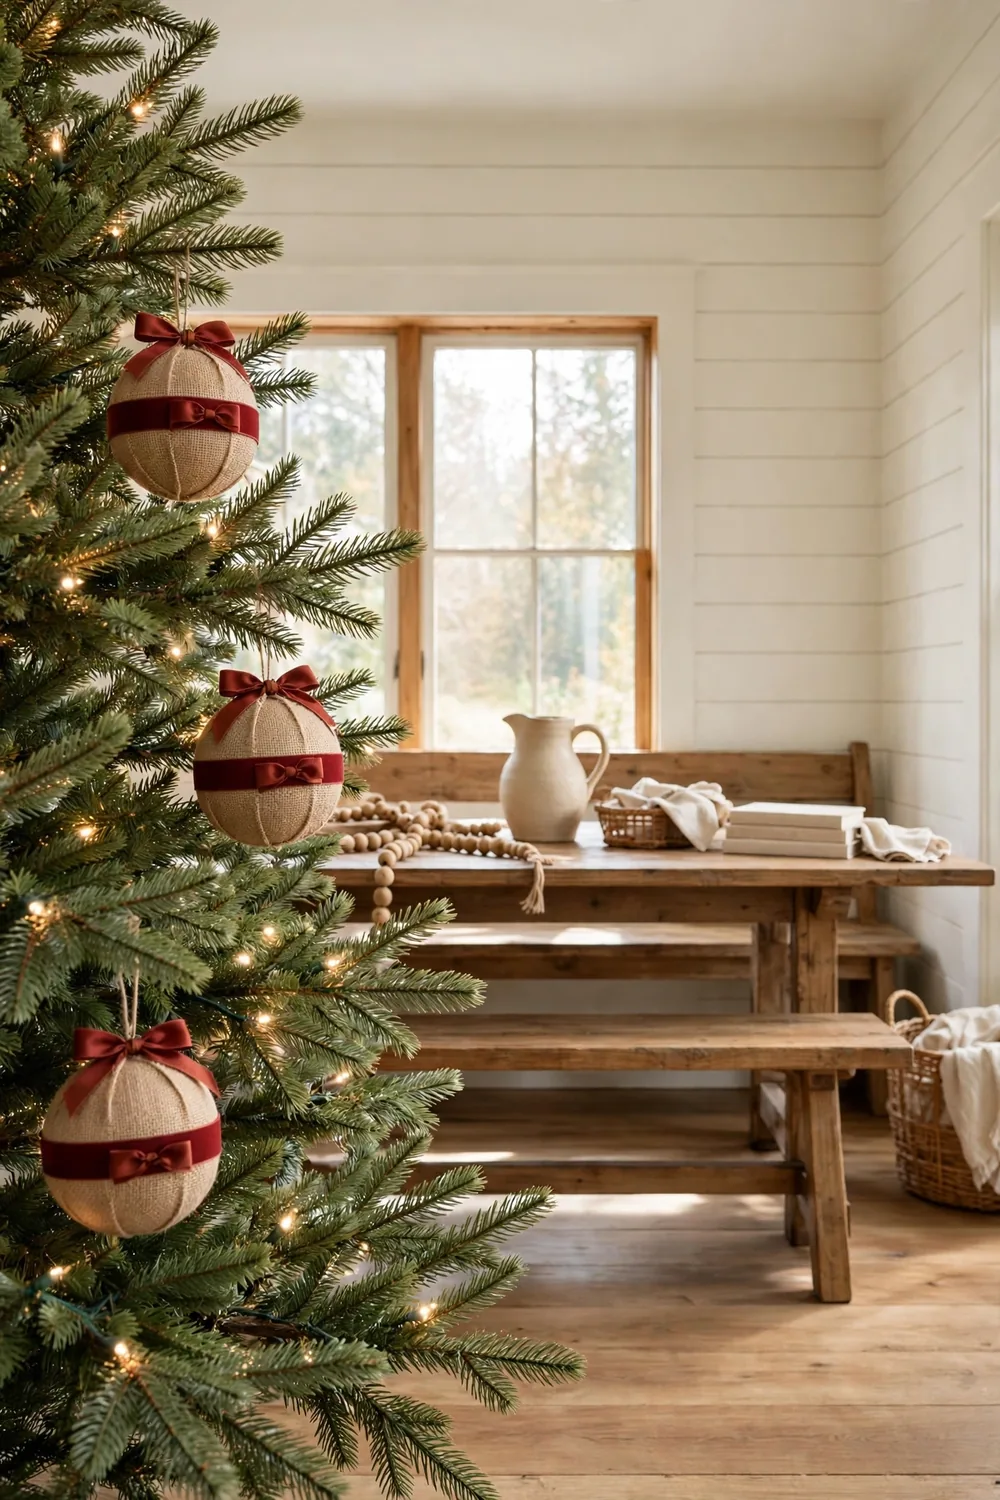
Wrap plain baubles with wide burlap ribbon, overlapping each pass and gluing the end flat at the back. Tie a slim satin ribbon in a deep color around the middle and finish with a small bow at the top. Work over a tray to catch loose fibers.
Rough burlap next to smooth satin gives a rustic yet finished look. Natural tan burlap pairs well with deep red or forest green ribbon. These suit farmhouse trees and look great grouped in threes.
20. Gilded Seashell Ornaments

Brush gold craft paint along the edges of scallop or clam shells and let them dry fully before handling. Drill a tiny hole near the hinge with a hand drill. Thread thin gold cord through and knot it into a hanging loop.
Pair these with white lights and pale blue accents for a coastal Christmas look. Mix large shells with small ones so the tree gains both statement pieces and fillers. Rinse beach shells in warm soapy water and dry them first.
21. Crocheted Mini Stocking Ornaments
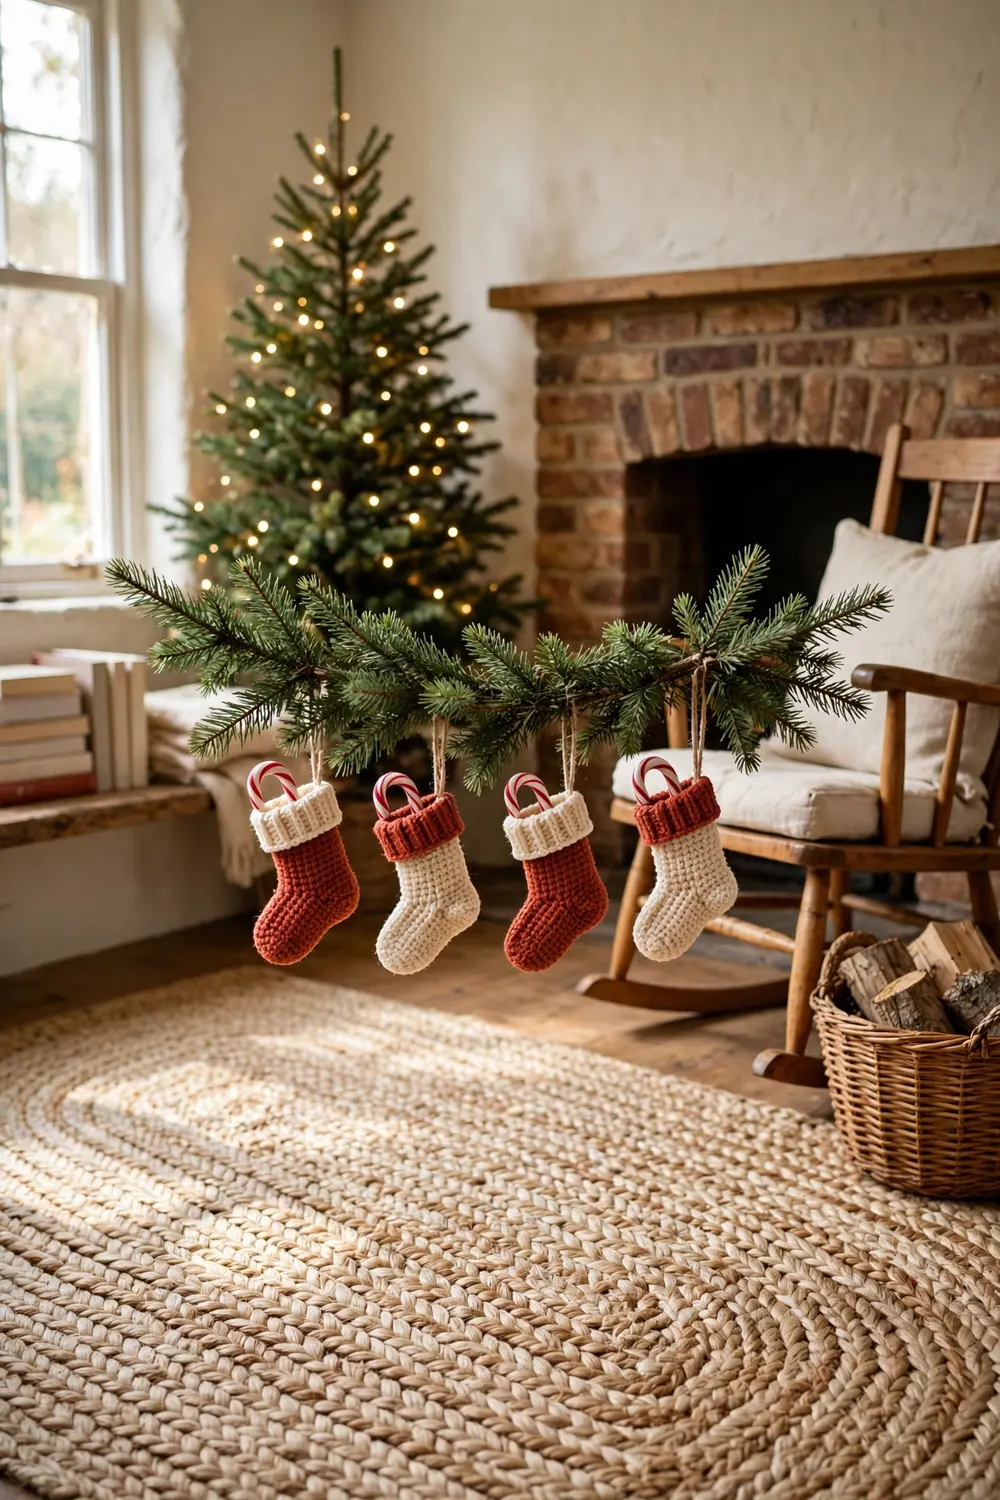
Crochet tiny stockings about four inches tall with a basic single-crochet pattern and worsted yarn. Work in rounds from the toe up and fold the cuff down to show a contrast color. Chain a short loop for hanging.
Stuff each stocking lightly with fiberfill so it keeps its shape on the branch. Tuck a candy cane or pine sprig into the top for a sweet finish. Most beginners can finish one stocking in a single evening.
22. Popsicle Stick Sled Ornaments
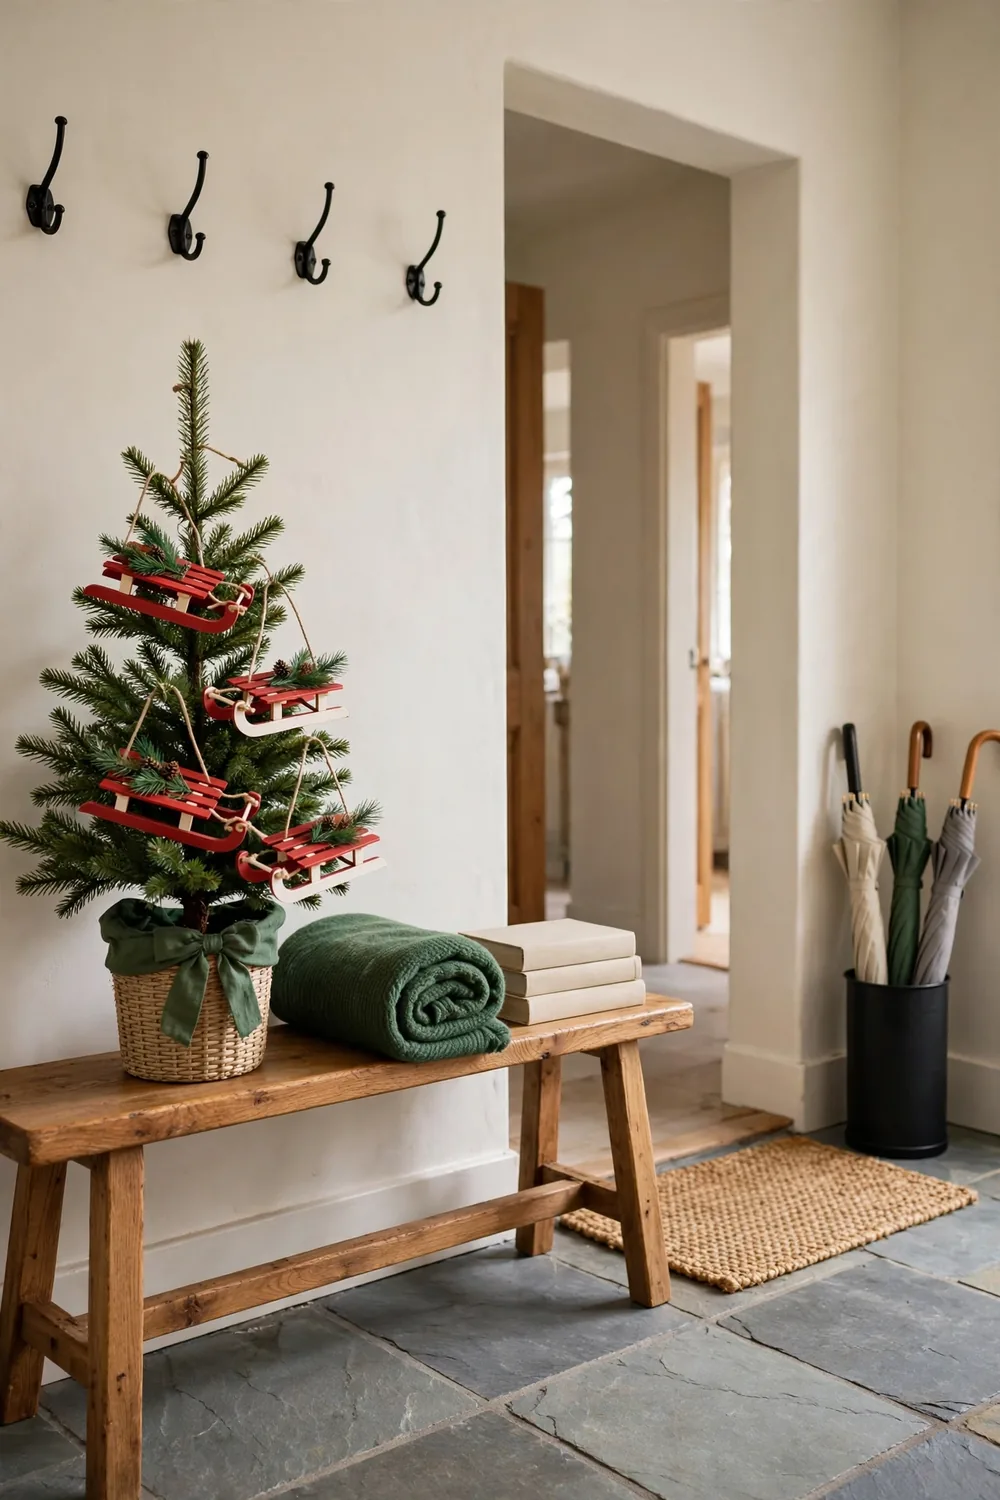
Glue craft sticks side by side to form a tiny sled seat. Glue two longer sticks beneath as runners and curve the front ends up slightly. Add small crossbars between the runners for strength, then paint the sled red with white runners.
Tie twine to the front as a pull rope and set a pine sprig or tiny gift box on the seat. Let the glue cure overnight before hanging so the joints hold firm. These also look sweet leaning on the tree skirt.
23. Fresh Pine Sprig Bundles
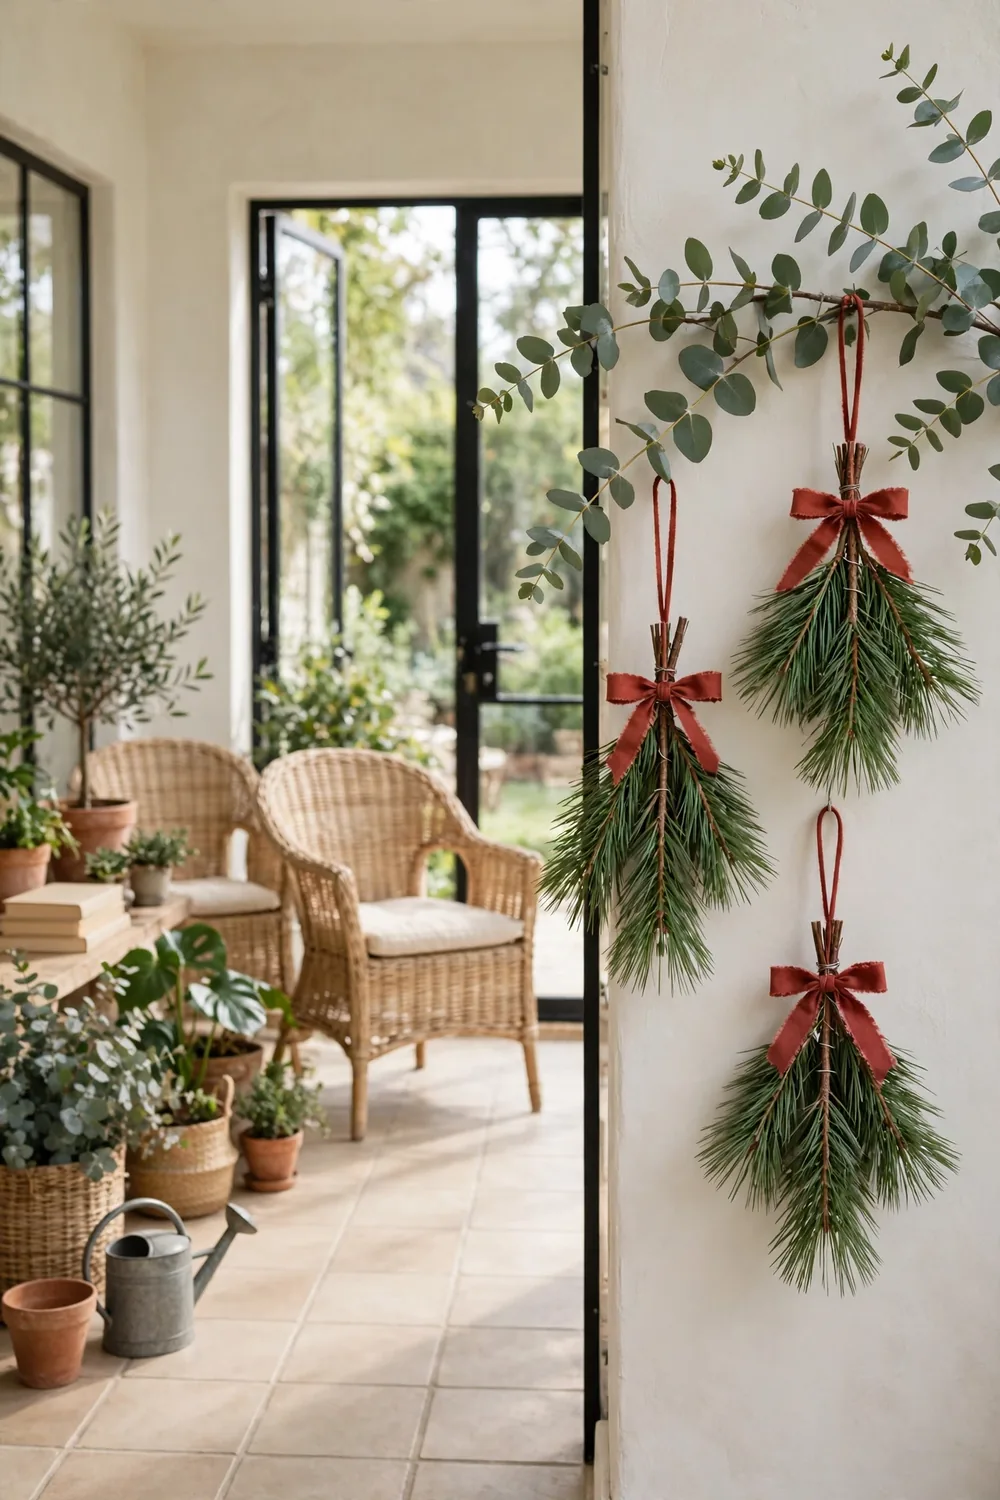
Snip pine, cedar, or fir sprigs to six-inch lengths and bind three or four together with floral wire. Wrap the wired joint with ribbon to hide it. Form a hanging loop from the same ribbon so the bundle dangles tip-down like a small swag.
Mist the bundles every few days to keep the needles fresh. Hang them on the tree or on doorknobs for a matching set around the house. Prune your own tree and the greens cost nothing at all.
24. Decorated Tin Lid Ornaments

Save lids from cookie tins and small round boxes for this vintage-style project. Decorate the flat side with painted designs or paper collages sealed under clear glue. Sand any sharp rim smooth with fine sandpaper before hanging.
Punch a small hole near the rim with a nail and hammer, working over scrap wood. Thread ribbon through the hole for a hanger. Old printed patterns around the tin edge add charm, so leave those borders showing.
25. Dried Flower Baubles

Fill clear baubles with tiny dried flowers, seed heads, and wisps of grass. Layer colors so each ball looks full from all sides. Place the largest pieces first with tweezers, then fill gaps with smaller bits through the wide opening.
Add a pinch of fine glitter for sparkle, cap the bauble, and tie a velvet ribbon loop at the top. Lavender and strawflower hold color well for years. Hang these where light passes through so the petals glow softly.
Frequently Asked Questions
What are the easiest DIY Christmas ornaments for beginners?
Start with cinnamon stick bundles, dried orange slices, or yarn-wrapped balls. These need no special tools, and each one takes under an hour. Supplies cost little, so early tries stay cheap. Make a full set of one style before moving to harder projects.
How do you keep homemade ornaments safe on the tree?
Hang heavy pieces on sturdy inner branches close to the trunk, where the wood runs thickest. Keep fragile items like walnut shells and quilled snowflakes on upper branches, away from pets and small kids. Pack each ornament in tissue inside a divided box after the season.
Which supplies should you buy before ornament season starts?
Buy craft glue, natural twine, ribbon in two or three colors, and foam balls in mixed sizes. These four supplies cover most ideas on this list. Add red, green, white, and gold acrylic paint plus a small hot glue gun, and you can build nearly anything here.
Can kids help make these ornaments?
Kids can help with many of these projects, especially fabric balls, button wreaths, and salt dough handprints. Give them safe jobs like wrapping, painting, and sorting while adults handle hot glue and sharp tools. Ornament night works well as a family evening with cocoa on the side.
Give It a Try
A tree full of handmade ornaments tells the story of the season better than any store display. Start with one or two favorites from this list. Add a few new ones each year until the tree holds a full collection of memories. Start this weekend and enjoy every minute of the making.